

Import Tests From QMetry
Bringing tests in QMetry into Testomat.io takes three steps: export them from QMetry, run a script that converts the file, then upload what the script produced.
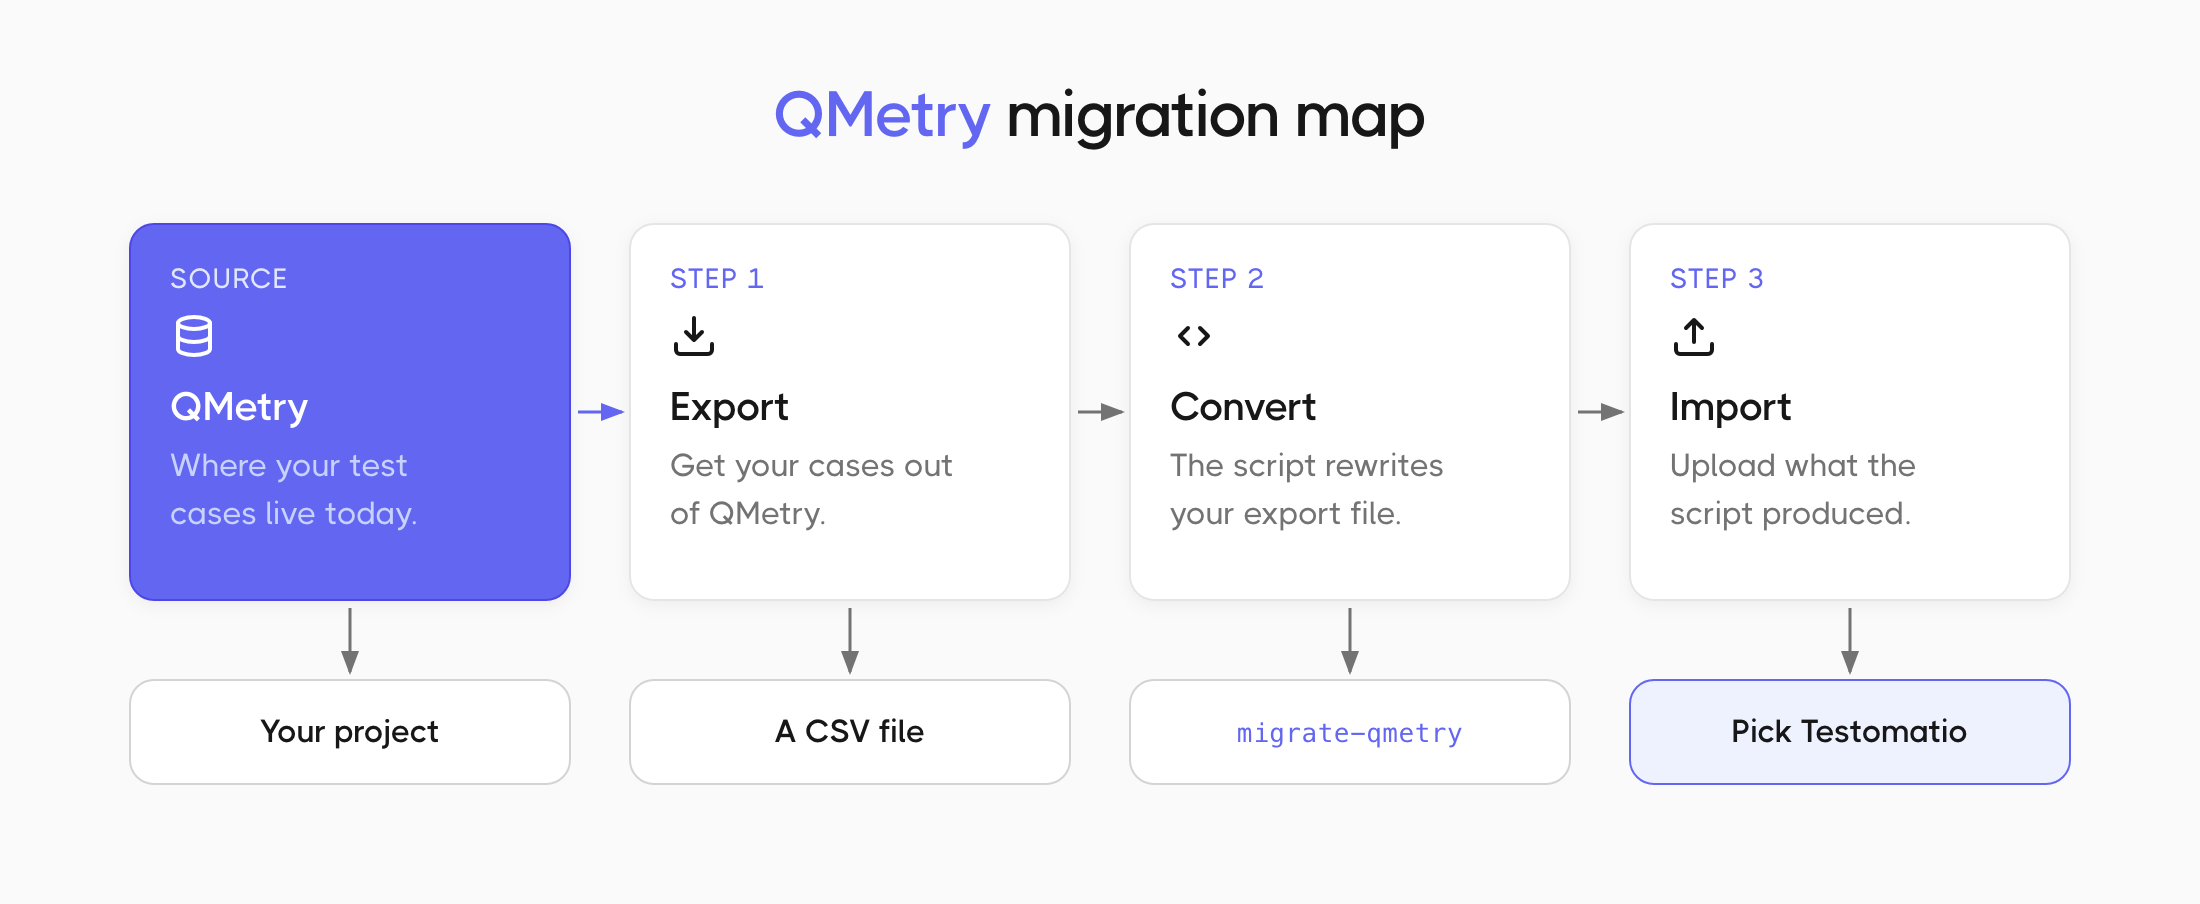
Export from QMetry
Section titled “Export from QMetry”- Open your project in QMetry.
- Export your test cases as a CSV file.
- Save the file on your computer.
Convert the file
Section titled “Convert the file”The migration script turns your QMetry CSV into a file Testomat.io can read. You can also use it to rename columns or restructure your cases on the way across.
- Open the migration script instructions on GitHub.
- Follow the setup steps there and run the script against your QMetry file.
- Save the file the script produces. That is the one you upload.
Import your QMetry file
Section titled “Import your QMetry file”Start importing your tests to Testomat.io:
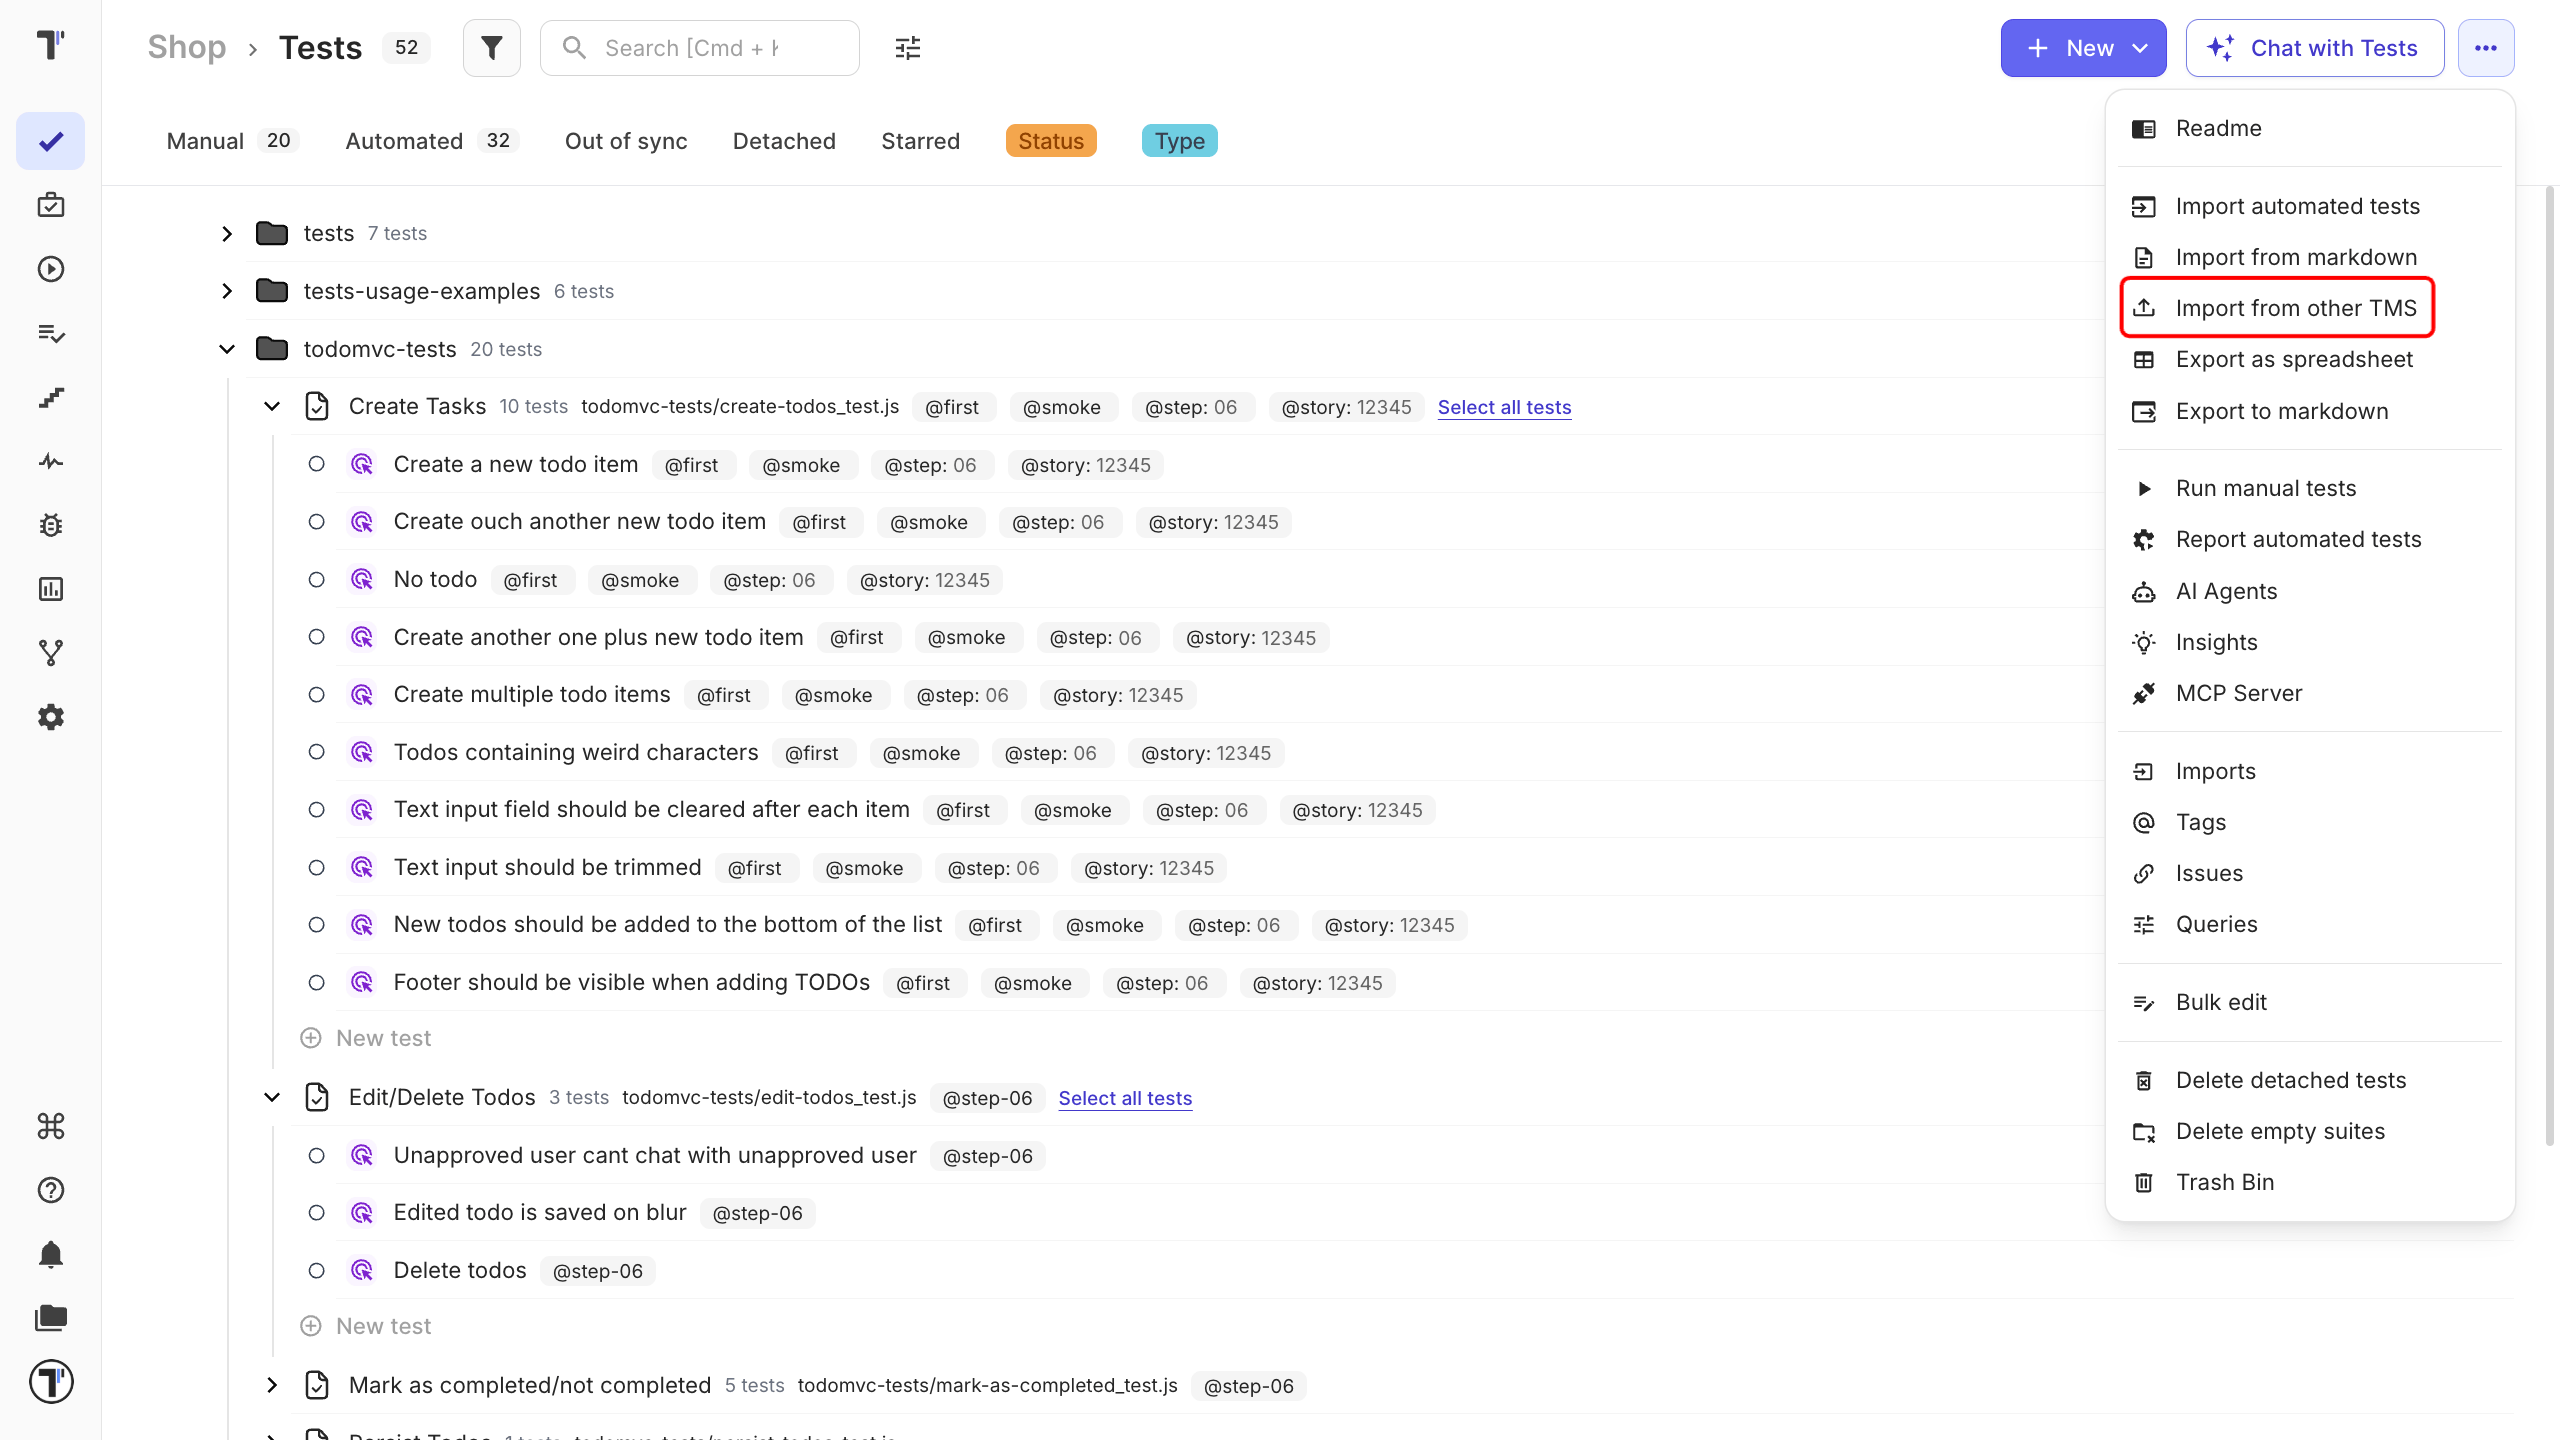
- Open your project and go to the Tests tab.
- Click the (
…) menu. - Choose Import from other TMS.
In the Imports window:
- Click Import.
- Choose Import from CSV. A sidebar opens on the right.
- Choose Testomatio from the dropdown.
- Click Choose file, select your exported and converted CSV.
- Click Create.
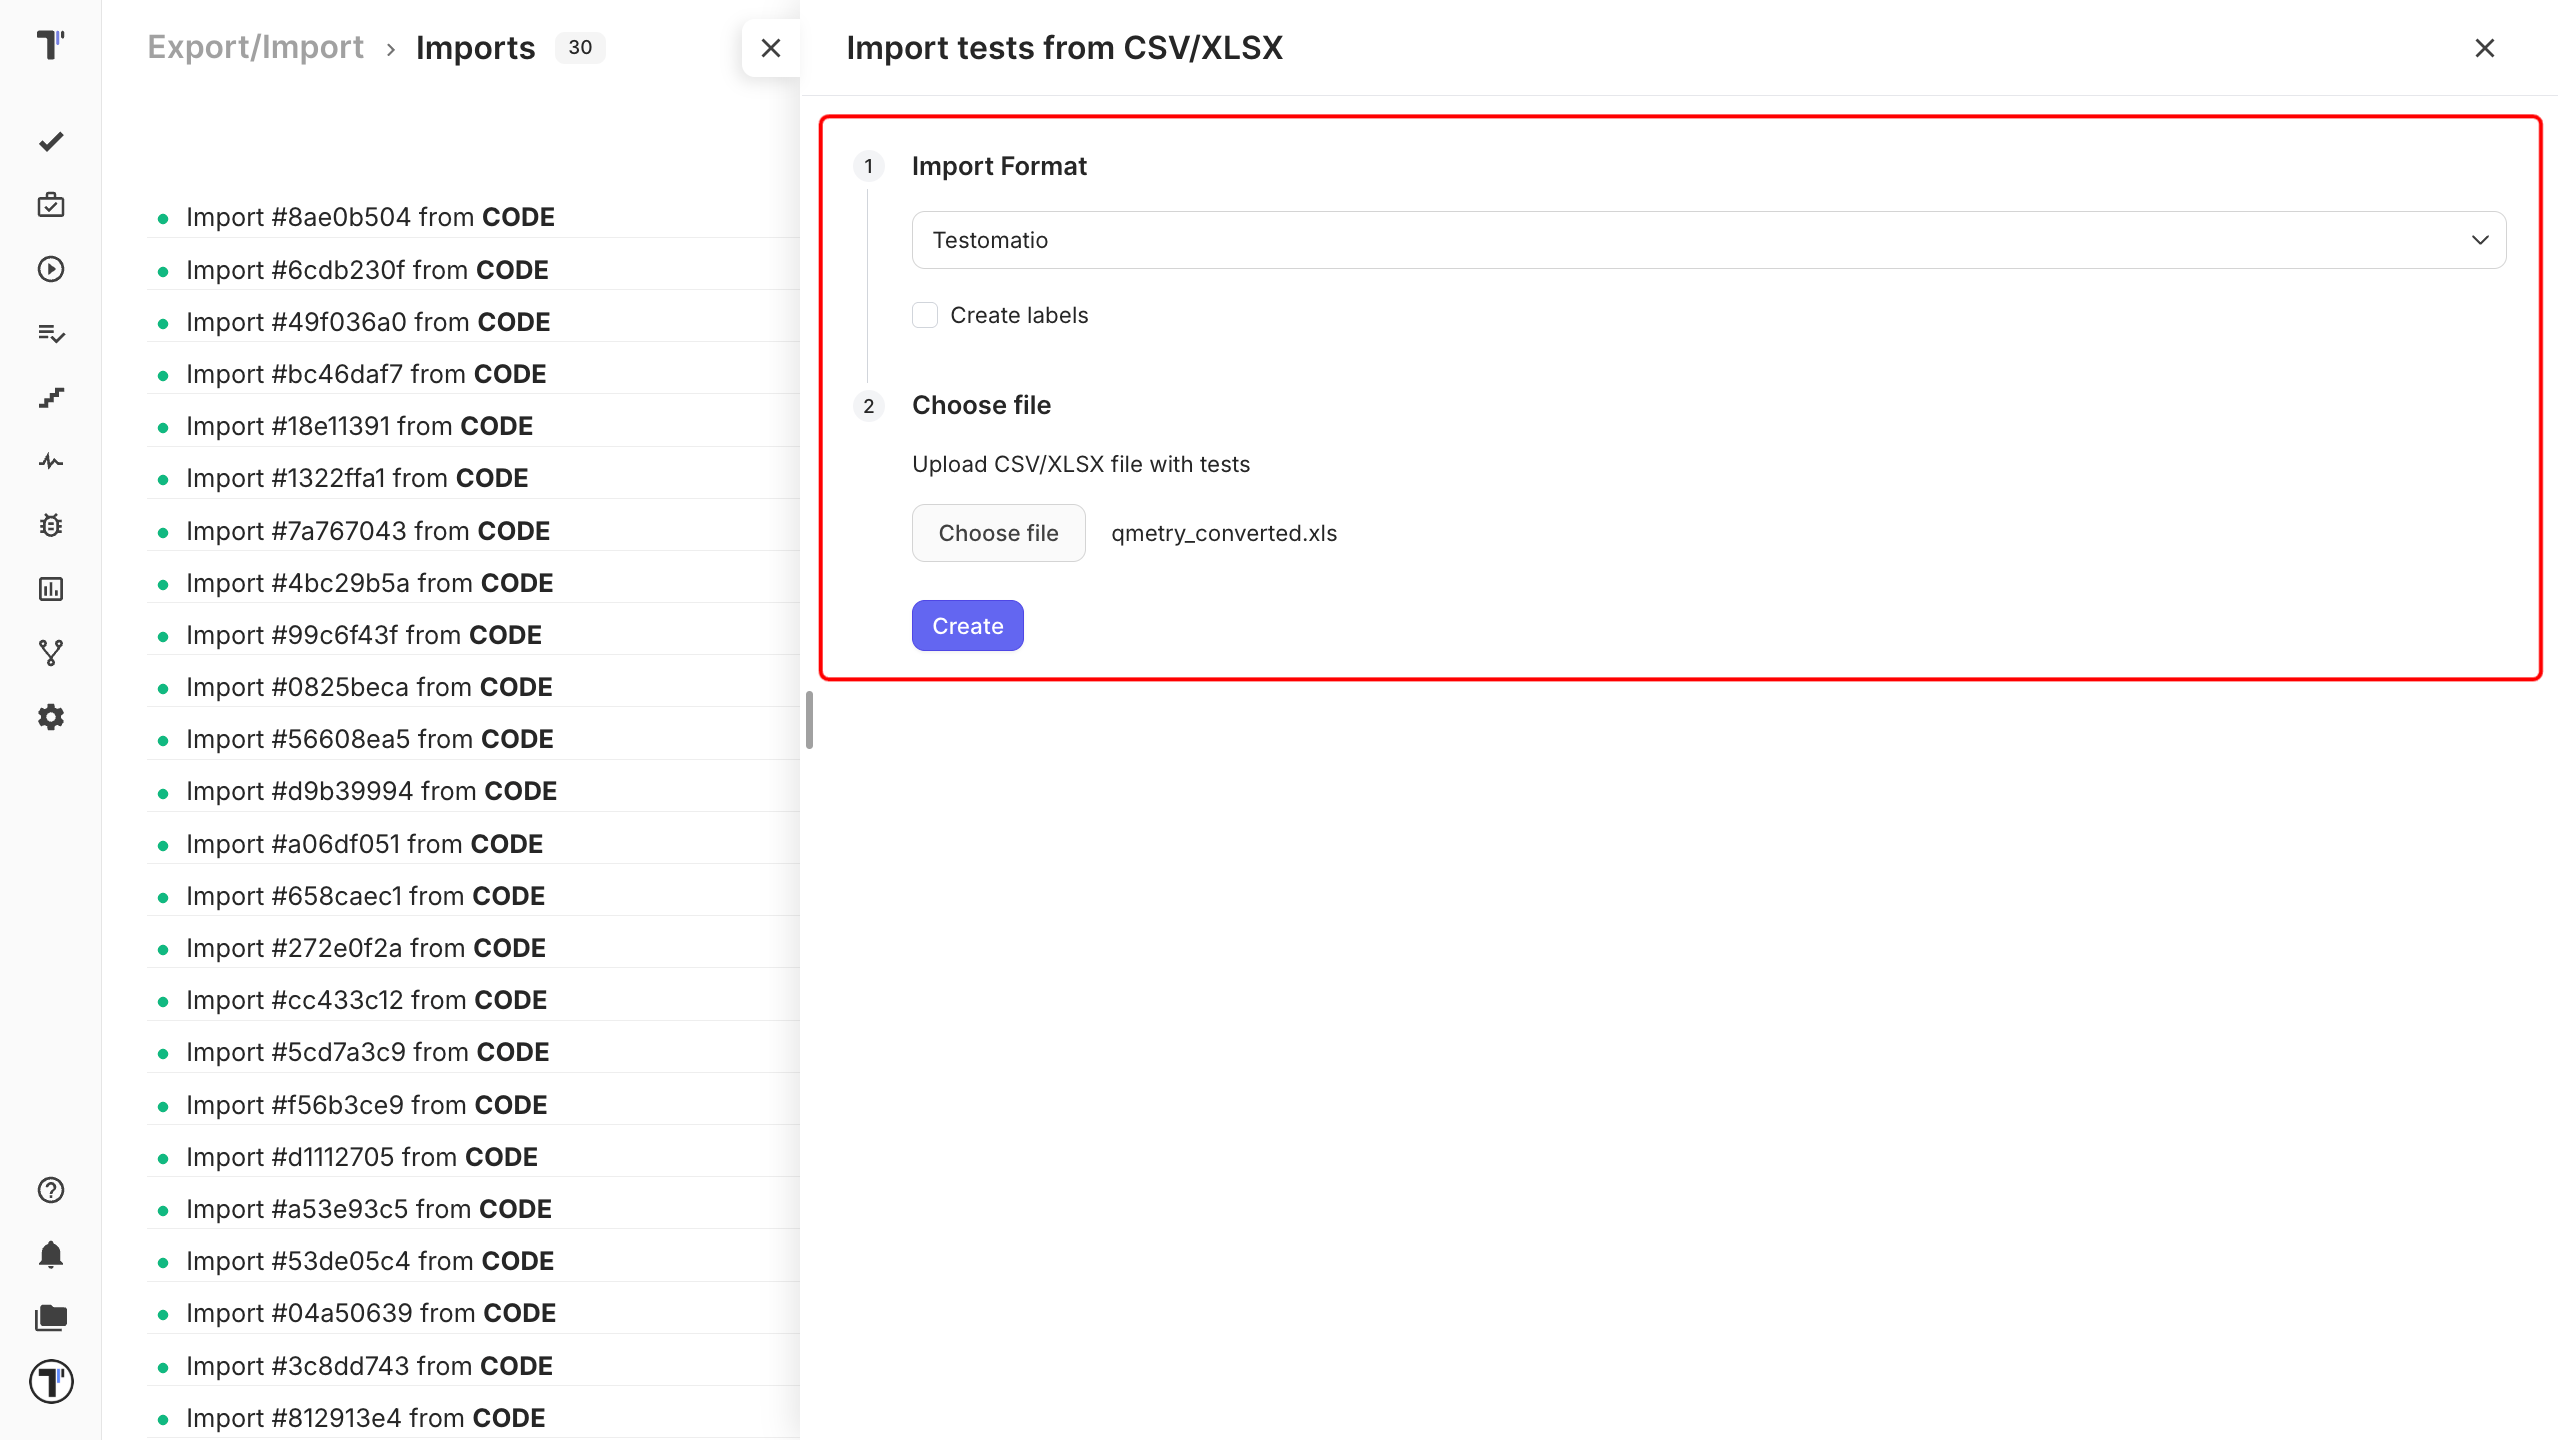
Testomat.io reads the file, and your tests appear on the Tests page.
If this doesn’t work
Section titled “If this doesn’t work”- There is no QMetry option in the dropdown. There is not meant to be one. Pick Testomatio instead.
- The import fails. Check that you uploaded the file the script produced, not your original QMetry export.
- Something is still off. Contact support with your file attached.
Next steps
Section titled “Next steps”- Import from CSV/XLSX - the column reference and every other supported format.
- Running Tests Manually - run the tests you just imported and record the results.
- Labels and Custom Fields - organize your imported tests by priority, type, or any QMetry field.